Custer State Park, South Dakota: Best Things to Do – Top Picks

Custer State Park, South Dakota: Best Things to Do - Top Picks
Book reservations in numerous Languages + World Currencies.

Hotels by Trip.com

Flights by Trip.com

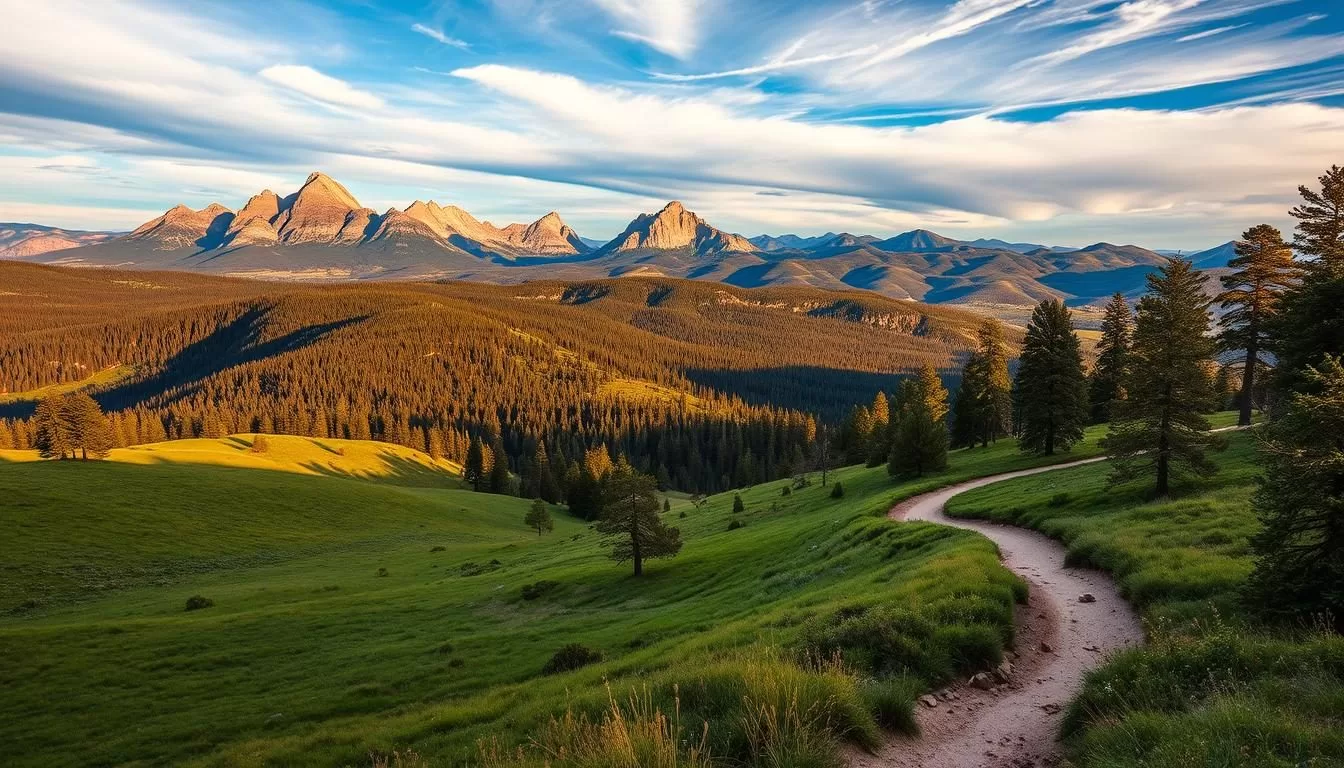
Imagine a place where scenic beauty and wildlife encounters come together in perfect harmony. Custer State Park is that place, offering an unforgettable experience amidst its 71,000 acres of stunning landscapes.

As one of South Dakota’s most treasured natural areas, this park is a crown jewel of the state park system. You’ll discover why some visitors prefer it to nearby national parks, with its incredible blend of scenic drives, wildlife viewing, and hiking adventures.

Whether you’re planning a dedicated trip to the park or including it as part of a larger Black Hills adventure, this guide will walk you through the best things to do in Custer State Park.

Discover the Natural Beauty of Custer State Park

If you’re looking for a mix of adventure and scenic beauty, Custer State Park in South Dakota’s Black Hills is the perfect destination. This park is a haven for those who enjoy the outdoors, with its diverse landscapes and wildlife.

Location and Overview of Custer State Park

Custer State Park is nestled in the southwestern corner of South Dakota, in the heart of the beautiful Black Hills region. The park spans an impressive 71,000 acres, featuring diverse landscapes from rolling prairies to granite peaks. This makes it easily accessible when visiting other nearby attractions like Mount Rushmore and Wind Cave National Park.

Best Time to Visit and Park Entrance Fees

Spring through fall is generally the best time to visit Custer State Park, with summer temperatures typically in the 80s. The park’s entrance fee is $20 per vehicle, granting a seven-day pass. This makes it an affordable option for families. During summer afternoons, be prepared for possible thunderstorms. The Black Hills also offer great fall foliage, typically from late September through mid-October.

The park’s diverse landscapes and activities make it a great destination for outdoor enthusiasts. You can enjoy the park’s lakes, hiking trails, and wildlife, including bison and prairie dogs.

Wildlife Loop Road: A Safari Adventure in South Dakota

Get ready for an unforgettable safari experience on the Wildlife Loop Road, a scenic 18-mile route through Custer State Park. This semi-circular route takes you through the southern heart of the park, offering an abundance of wildlife viewing opportunities.

What to Expect on the Wildlife Loop Road

The Wildlife Loop Road is one of the most popular activities in Custer State Park, attracting visitors from all over the world. As you drive along this 18-mile route, expect to encounter a variety of wildlife, including bison, prairie dogs, coyotes, and elk. Be prepared for stop-and-go traffic as you take in the breathtaking views and interact with the park’s friendly inhabitants.

Best Spots to See Bison, Prairie Dogs, and the Famous “Begging Burros”

For the best bison viewing opportunities, head to the Buffalo Corrals area in the southeastern part of the park. The eastern portion of the Wildlife Loop Road is also teeming with bison, particularly between the visitor center on Highway 16A and the Wildlife Station Visitor Center. Keep an eye out for the park’s famous “begging burros” near the intersection with Lame Johnny Road, and enjoy the antics of prairie dogs between the Blue Bell Entrance and 4 Mile Draw road.

Tips for Driving the Wildlife Loop Road

To make the most of your Wildlife Loop Road experience, plan to spend at least 1-2 hours driving this route. The best times for wildlife viewing are early morning and late afternoon when animals are most active. Remember to maintain a safe distance from all wildlife, especially bison, which can be unpredictable despite their docile appearance. Drive slowly and be prepared to stop frequently to take in the rolling prairie landscapes and capture memorable photos.

Scenic Drives Through Breathtaking Landscapes

Embark on a journey through Custer State Park’s breathtaking landscapes via its renowned scenic drives. The park offers a range of drives that cater to different interests and time constraints, but two stand out: the Needles Highway and Iron Mountain Road.

Needles Highway and the Eye of the Needle

Generate an image of the Needles Highway with the Needles Eye Tunnel in Custer State Park

✓  Check 30,000+ Local Sightseeing Tours Worldwide

Click Here

The Needles Highway is a 14-mile point-to-point drive that begins and ends on different points along route 16A in the park. You’ll be treated to amazing views of the tall needle-like rock spires that give the road its name. The drive features two narrow tunnels carved through the granite mountainsides, with the Needles Eye Tunnel being the most famous.

The Needles Highway offers a spectacular drive through granite spires and narrow tunnels, showcasing some of the most dramatic scenery in the Black Hills region. Plan approximately 45-60 minutes to drive the Needles Highway without stops, but allow extra time to pull over at viewpoints and marvel at the unique rock formations.

Iron Mountain Road with Views of Mount Rushmore

Generate an image of Iron Mountain Road with a view of Mount Rushmore

Iron Mountain Road twists and turns as you maneuver your way out of the park, offering stunning views and engineering marvels like “pigtail bridges.” The most memorable moment comes when driving northbound through the Doane Robinson Tunnel, which perfectly frames Mount Rushmore in the distance.

Both the Needles Highway and Iron Mountain Road feature narrow tunnels with size restrictions, so be sure to check your vehicle’s dimensions if driving an RV or larger vehicle. The Needles Highway typically closes with the first snowfall and reopens April 1st, so plan your visit accordingly.

Custer State Park, South Dakota: Best Things to Do – Top Picks for Hiking Enthusiasts

Custer State Park is a hiker’s paradise, offering trails for all skill levels amidst the breathtaking beauty of the Black Hills. As you explore the park’s diverse landscapes, you’ll discover that each trail offers a unique experience, from easy lakeside strolls to challenging summit climbs.

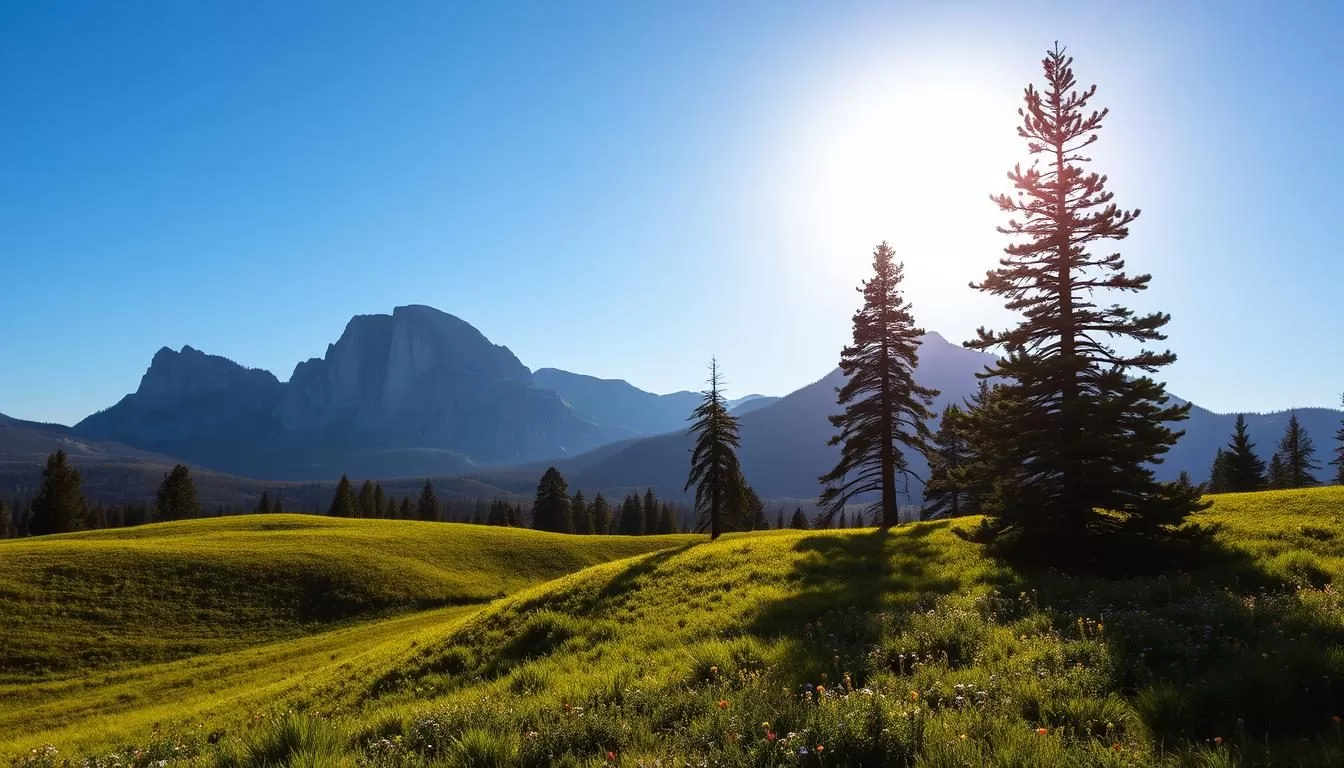
Black Elk Peak: Hiking to South Dakota’s Highest Point

Generate an image of Black Elk Peak's summit with panoramic views.

Black Elk Peak stands as South Dakota’s highest point at 7,242 feet, offering a moderately challenging 6.5-7.5 mile round-trip hike with approximately 1,500 feet of elevation gain. The summit rewards hikers with panoramic views of four states and features a historic stone fire tower.

Cathedral Spires and Little Devil’s Tower Trails

The Cathedral Spires Trail offers an accessible 3-mile round-trip hike through a forest of towering granite formations, creating a natural cathedral-like setting. For a shorter but equally rewarding experience, the 3-mile round-trip Little Devil’s Tower trail includes fun rock scrambling sections and provides spectacular views of the surrounding Black Hills.

Sylvan Lake and Other Water Activities

Generate an image of Sylvan Lake with kayakers paddling on the crystal-clear waters.

Sylvan Lake serves as both a hiking destination and a recreation hub, with a scenic 1-mile loop trail around the lake featuring unique rock formations and crystal-clear waters. Beyond hiking, Sylvan Lake offers swimming, fishing, kayaking, and paddleboarding opportunities, making it a perfect spot to cool off after a day on the trails.

Most hiking trails in Custer State Park are accessible from May through October, with summer mornings providing the most comfortable hiking temperatures and fewer afternoon thunderstorms. Whether you’re a seasoned hiker or just starting out, Custer State Park has something to offer, making it a must-visit destination for outdoor enthusiasts.

Planning Your Visit to Custer State Park

Custer State Park is a gem in South Dakota’s Black Hills, and with some planning, you can enjoy its beauty to the fullest. To make the most out of your trip, consider spending at least one full day exploring the park. The scenic drives, such as Needles Highway and Wildlife Loop Road, are must-experiences, but they require time due to the narrow and curvy roads.

Even if you’re not an avid hiker, taking a short trail like the one around Sylvan Lake or Legion Lake can be a great way to experience the park’s natural beauty. With more time, you can explore further and enjoy the various hiking trails, including those to Black Elk Peak and Cathedral Spires.

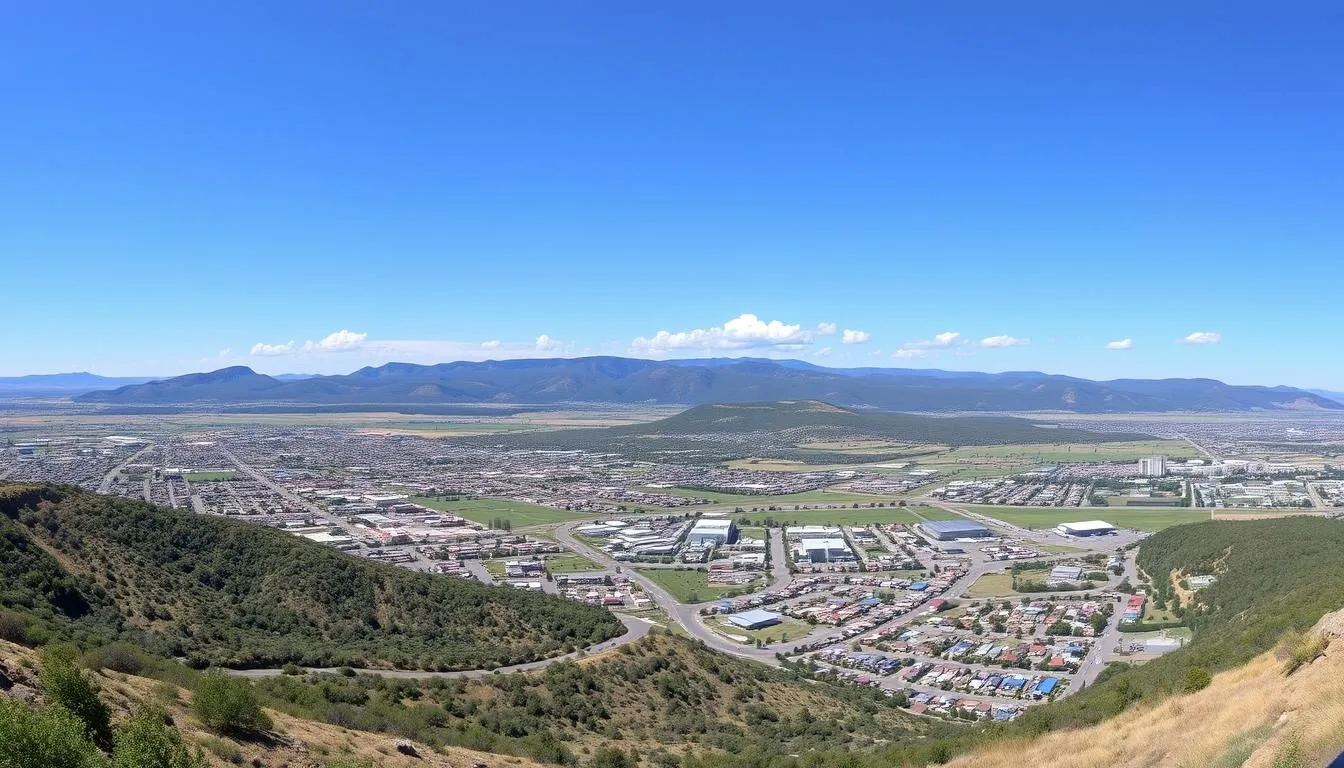
Accessibility and Accommodation: The closest airport to Custer State Park is in Rapid City, just 40 minutes away, making it convenient for travelers. You can stay within the park at one of the four lodges or nine campgrounds for a more immersive experience. Alternatively, nearby towns like Custer and Keystone offer additional accommodation options.

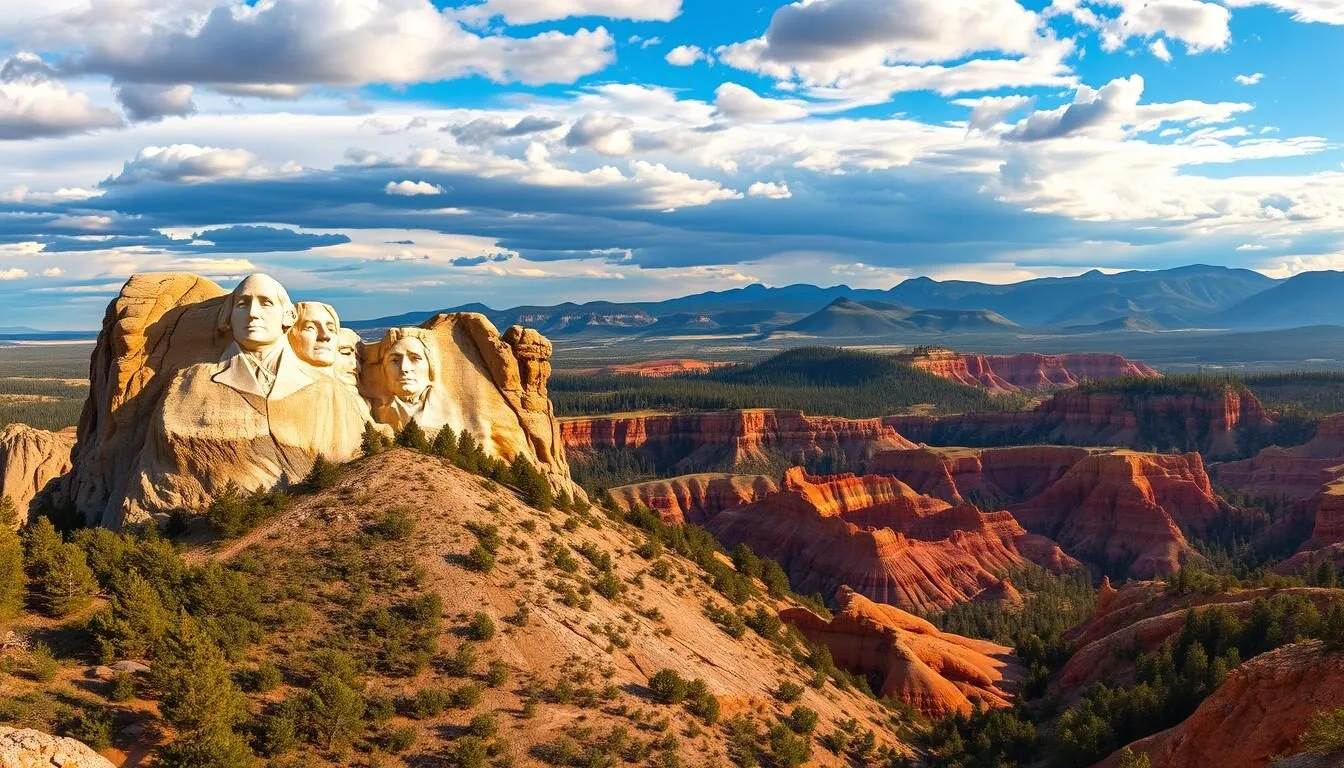
Nearby Attractions: Custer State Park is an excellent centerpiece for a broader Black Hills itinerary. You can easily visit nearby attractions like Mount Rushmore (20 miles, 45 minutes away), Wind Cave National Park (11 miles, 30 minutes away), and Badlands National Park (70 miles, 1 hour 15 minutes away). Other worth-visiting places include Jewel Cave National Monument and Crazy Horse Memorial.

Tips for Visiting: To avoid crowds during peak summer season, arrive early in the morning. Download the park map before your visit and stop by the Visitor Center for current information on wildlife sightings and road conditions. Don’t forget to pack essentials like water, snacks, binoculars, and a camera.

By planning your visit to Custer State Park, you can ensure a memorable and enjoyable trip to this stunning South Dakota destination.

When preparing for a cruise, it is easy to remember the obvious items: swimsuits, formal wear, sunscreen, and flip-flops. However, cruise ship cabins are highly unique environments with specific regulations and structural layouts that differ completely from standard hotel rooms.

If you only pack like you are staying at a land-based resort, you might find yourself dealing with a dead phone battery, a damp swimsuit, or a cabin door that slams shut at the slightest breeze.

To ensure your cabin functions perfectly, add these five unexpected, high-utility essentials to your packing list.

1. Magnetic Cabin Hooks

Space is at a premium inside a standard stateroom, and counter space can disappear quickly once you unpack your toiletries and electronics.

  • Why you need them: Cruise ship walls are not made of drywall; they are constructed from solid steel. This means the entire cabin is a giant magnet-friendly zone. Heavy-duty magnetic hooks can be slapped directly onto the walls or ceiling to create instant hanging space.

  • Best uses: Hang up your wet swimsuits to dry, air out your formal wear, or hang your lanyards, hats, and day bags right by the door so they don't clutter up the desk.

2. A Cruise-Approved Power Strip (No Surge Protectors)

Older cruise ships are notorious for having only one or two electrical outlets in the entire room, which is a major issue if you need to charge phones, cameras, tablets, and smartwatches overnight.

  • Why you need them: You cannot simply grab any extension cord from your house. Cruise lines strictly prohibit standard household surge protectors because they pose a severe fire hazard to the ship’s unique electrical grid. Security will confiscate them at the luggage scanner.

  • What to buy instead: Look for an extension block explicitly labeled as "Non-Surge Protected" or certified cruise-compliant. Many of these feature a mix of traditional outlets and USB ports to handle all your devices safely.

3. Over-the-Door Organizer

The bathroom vanity in a cruise cabin is notoriously small, often featuring just a couple of narrow glass shelves to hold everything for multiple passengers.

  • Why you need them: A clear, plastic over-the-door shoe organizer hung on the back of your bathroom door keeps all your small items visible and off the limited counter space.

  • Best uses: It is perfect for storing sunscreen, medications, makeup, hairbrushes, room cards, sunglasses, and charging cables.

4. A Heavy Rubber Doorstop

Cruise ship cabin doors are heavy, fire-rated steel structures equipped with intense automatic closing mechanisms designed to slam the door shut immediately behind you.

  • Why you need them: If you are trying to coordinate with family members in a nearby room, carrying heavy luggage over the threshold during embarkation day, or enjoying a breeze while sitting out on your private balcony, a heavy rubber doorstop is a lifesaver. It keeps the door securely propped open without relying on a heavy suitcase to hold it back.

5. Lanyards or Card Holders

Your room key (often called a cruise card) is your lifeblood on the ship. It acts as your room key, your identification boarding and leaving the ship at port, and your digital wallet for every onboard purchase.

  • Why you need them: Because men's swim trunks and women's sundresses rarely have deep, secure pockets, it is incredibly easy to misplace a loose plastic card while lounging on a pool deck chair. A simple lanyard or a sticky card sleeve attached to the back of your smartphone keeps your card safe and accessible at all times.

🛑 A Quick Warning on Prohibited Items

Before adding extra items to your luggage, remember that cruise lines ban heating elements to prevent fires. Leave the clothing irons, steamers, hot plates, and candles at home—the ship’s laundry service or a bottle of wrinkle-release spray can handle your wrinkled clothes instead.

When booking a cruise stateroom, you face one final choice after picking your deck and room category: Port or Starboard?

For decades, maritime tradition has designated the left side of the ship as Port (think of how both words have four letters) and the right side as Starboard when facing forward toward the bow.

Many first-time cruisers stress over this choice, worried they will spend a week staring at the empty ocean while passengers on the opposite side enjoy stunning postcard views. Let’s clear up the myths and look at how to choose the ideal side of the ship for your next vacation.

The Sunset Myth: Can You Guarantee a View?

The single most common reason travelers agonize over port vs. starboard is wanting to watch the sunset from their private balcony.

  • The Reality: Unless your cruise is a straight line going in one direction for seven days, the ship will be constantly changing heading. It snakes around islands, navigates twisting fjords, and turns around completely to head home.

  • The Math: If you are sailing south, the starboard side faces west (sunset) and the port side faces east (sunrise). When you turn around to sail north back to your home port, those views swap completely.

3 Scenarios Where the Side of the Ship Matters

While general ocean crossings make the side of the ship mostly irrelevant, there are three specific travel scenarios where your choice will drastically impact your experience.

1. One-Way Landfall Itineraries (e.g., Alaska or Europe Northbound)

If you are taking a cruise that begins in one city and ends in another without turning back, the side of the ship is critical.

  • Northbound Alaska: If you are sailing north from Vancouver or Seattle up to Seward or Whittier, the starboard side will face the dramatic mountain ranges, coastal forests, and passing wildlife for the majority of the trip. The port side will face the open Pacific Ocean.

  • Southbound Alaska: If you are starting up north and sailing south, you want the port side to stay facing the coastline.

2. Scenic Cruising Days (Glaciers and Fjords)

Some itineraries feature dedicated days where the ship sails deep into a narrow bay or fjord strictly for sightseeing, such as Glacier Bay in Alaska or the Geirangerfjord in Norway.

  • The Reality: Captains want everyone to get their money's worth. When entering a scenic area, the ship will typically slow down or spin a full 360 degrees in front of major landmarks so both sides of the vessel get a view.

  • The Catch: While both sides get a view eventually, one side will get it while you are getting ready in the morning, and the other will get it while you are at lunch.

3. Iconic Harbor Departures

Sailing out of certain world-famous ports offers spectacular sights right from your balcony—if you choose correctly.

  • Sailing out of New York City: If you want a close-up, unobstructed view of the Statue of Liberty as the ship heads out to the Atlantic, you need to be on the port side.

What About Docking at the Pier?

A common belief is that the port side always faces the cruise terminal or town dock. After all, it's called the "port" side for a reason.

In the modern cruising world, this is completely false. How a ship docks depends entirely on:

  1. Coast Guard or Local Regulations: Marine traffic safety dictates how a ship must enter a harbor.

  2. Ship Maintenance: Ships often dock with a specific side facing the pier so crew members can paint the hull or perform safety drills on the lifeboats.

  3. Port Availability: If multiple ships are docked side-by-side, the captain will park whichever way fits safely.

You have a 50/50 chance of facing the bustling town or the open water on either side of the ship when tied up at a pier.

Summary Checklist: How to Choose

If you are still undecided, use these guidelines to make your final choice:

  • Choose Port If: You are taking a one-way southbound itinerary, love watching the sunrise while heading south, or want a view of the skyline when departing certain eastern ports.

  • Choose Starboard If: You are taking a one-way northbound itinerary, prefer watching the sunset while heading south, or enjoy seeing the coast while sailing north.

  • Choose Mid-Ship (Regardless of Side) If: You are prone to motion sickness. Staying low and centered on the ship matters significantly more for stability than being on the left or right side.

When booking a cruise, it is incredibly easy to get swept up in the excitement of choosing between an interior, oceanview, or balcony room. Cruise lines make every cabin look like a pristine, peaceful sanctuary in their brochure photos.

But seasoned cruisers know a hard truth: A cabin’s location on the deck plan matters significantly more than the room type itself.

If you choose the wrong spot, you could find yourself sleeping directly beneath a pounding nightclub subwoofer, or waking up at 5:00 AM to the sounds of metal lounge chairs scraping across a deck. To ensure your next vacation is actually relaxing, pull up your ship’s deck plan and ensure you aren’t accidentally booking one of these five problematic cabin locations.

1. The "Lido Deck Victim" (Directly Under the Pool or Buffet)

This is arguably the most common mistake first-time cruisers make. They see a cabin on a high deck just one floor below the pool and think, "Perfect! I’m only steps away from the action."

  • The Reality: The deck directly above you isn't just a place to swim; it is a high-traffic service zone. At 5:30 AM every single morning, the crew begins dragging hundreds of heavy, metal-framed lounge chairs across the deck to set up for the day, creating a loud, screeching noise that radiates straight through your ceiling.

  • How to avoid it: Always look at the deck plan for the level directly above your cabin. If it's the pool deck, the buffet, or a sports court, change your room.

2. The Late-Night Noise Trap (Above Nightclubs and Bars)

Conversely, you also have to look at what is directly below your feet. Many modern mega-liners place passenger cabins directly above the ship's main promenade, theater, or entertainment district.

  • The Reality: If your room sits over the main theater, a busy piano bar, or the nightclub, you are going to experience intense ambient noise. Even if a ship has great soundproofing, bass frequencies travel effortlessly through steel hulls. If the nightclub thumps until 2:00 AM, your cabin walls will likely vibrate right along with it.

  • The Worst Culprit: Cabins located near the aft (rear) elevator banks on lower passenger decks are notorious for sitting right over the ship's loudest late-night lounges.

3. The "Early Morning Wake-Up Call" (Lower Forward Cabins)

If you are trying to save money, the lowest passenger decks at the very front (bow) of the ship often look like an incredible bargain.

  • The Reality: These rooms face two major issues: motion and mechanics. The front of the ship acts like a teeter-totter; it pitches up and down far more dramatically than the middle of the ship, making it a nightmare if you are prone to seasickness.

  • The Hidden Noise: When the ship arrives at a port early in the morning, the captain will fire up the bow thrusters to maneuver, causing the entire front of the ship to vibrate violently. If the ship is dropping anchor rather than docking at a pier, the massive, clanging anchor chains are housed right next to these forward walls.

4. The Elevator Bank Bottleneck

Being close to the elevators seems like a great accessibility hack to cut down on walking down those incredibly long cruise ship corridors.

  • The Reality: Elevator lobbies are the primary meeting points on the ship. You will have to deal with the constant "ding" of the elevator doors opening and closing all night. Worse, you will hear crowds of high-energy passengers talking, laughing, and shouting as they return to their rooms after a few drinks at the bar.

5. Connecting Cabins (When You Don't Know the Neighbors)

Connecting cabins have a physical interior door that links two adjacent rooms—perfect for families traveling together. But if you are a solo traveler or a couple booking a standard room, cruise lines will frequently assign you a connecting room if it’s the last one available.

  • The Reality: An interior wooden connecting door provides significantly less sound insulation than a solid steel wall. Even when locked, you will likely hear your neighbors' television, their morning conversations, and the sound of their suitcases slamming around.

🛑 The Golden Rule of Cruise Booking

If you want a guaranteed quiet night of sleep, use the Sandwich Rule. Only book a cabin that is "sandwiched" safely between two other full decks of passenger cabins. If there are rooms above you and rooms below you, you are virtually guaranteed to avoid the ship's worst acoustic nightmares.

What About "Guarantee" Cabins?

When booking, you might see an option to book a "Guarantee Balcony" or "Guarantee Interior" at a steep discount. This means you pay a lower rate, but you let the cruise line pick your specific cabin number close to sail date.

While it's a great way to save money, keep in mind that cruise lines use this system to fill the rooms that nobody else wanted to pick. If you are a light sleeper or sensitive to motion, it is always worth paying a fraction more to hand-select your own room number safely away from the noise.

You’ve booked your cabin, picked your excursions, and now you’re staring at your cruise planner screen, facing one of the most hotly debated questions in travel: Should you buy the cruise drink package?

Cruise lines heavily market these unlimited packages, tempting you with the peace of mind that comes with a truly "all-inclusive" vacation. But at prices frequently soaring past $80 to $100+ per guest, per day (plus an automatic 18%–20% gratuity), a drink package can easily add over $1,400 to a 7-night vacation for a couple.

Let’s skip the marketing fluff and look at the actual math. Here is exactly how many drinks you need to consume per day to break even on major cruise lines right now, along with the hidden rules you need to know before you buy.

The Baseline: What Do Drinks Cost A La Carte?

To know if a package saves you money, you have to know what you’d spend without one. Across mainstream lines like Royal Caribbean, Carnival, and Celebrity, average a la carte prices generally sit within these ranges:

  • Cocktails & Mixed Drinks: $12 – $15

  • Glass of Wine: $10 – $14

  • Draft or Bottled Beer: $7.50 – $9.50

  • Specialty Coffee (Lattes, Espresso): $4.50 – $5.50

  • Bottled Water / Sodas: $3.00 – $4.00

Cruise Line Break-Even Math

Most lines require every adult sharing a cabin to purchase the package if one person does. This rule is designed to prevent couples from sharing a single package, and it drastically changes the financial math for a lot of travelers.

Here is what the daily math looks like based on average pre-cruise booking discounts:

1. Royal Caribbean (Deluxe Beverage Package)

  • Average Onboard Price: $75 to $105 per day (varies heavily by ship and sail date)

  • The Break-Even Number: 5 to 7 alcoholic drinks per day.

  • The Catch: If you use your package for morning specialty coffees, bottled waters to take to port, and fresh-squeezed juices, that break-even number drops to about 4 cocktails and 3 non-alcoholic premium drinks per day.

2. Carnival Cruise Line (CHEERS! Beverage Program)

  • Pre-Cruise Price: $64.95 per day (+18% gratuity)

  • The Break-Even Number: 5 to 6 alcoholic drinks per day.

  • The Catch: Carnival enforces a strict 15-alcoholic-drink limit per 24-hour period. While most people don't hit this cap, the package also includes unlimited sodas, energy drinks, and milkshakes.

3. Celebrity Cruises (Classic vs. Premium Package)

  • Average Price: Classic sits around $89/day; Premium sits around $109/day.

  • The Break-Even Number: 6 to 8 drinks per day.

  • The Catch: Celebrity’s Classic package only covers individual drinks up to $10. If you like premium spirits or high-end wine, you'll be charged the difference out of pocket unless you upgrade to the Premium package (which covers up to $17 drinks).

The "Hidden" Value: Non-Alcoholic Add-Ons

People often forget that these packages aren't just for alcohol. If you are someone who drinks a lot of fluids throughout the day, the non-alcoholic options can quickly push you into the profit zone.

Pro-Tip: If you drink two specialty lattes in the morning ($10), grab two large bottled waters for a shore excursion ($8), and have a Red Bull or soda by the pool ($5), you’ve already knocked $23 off your daily break-even target before ever touching a drop of alcohol.

When the Drink Package is WORTH It

  • You Love Peace of Mind: If you hate looking at your running balance on the ship's app and want to walk off the ship on the final morning with a $0 balance, buy the package.

  • You Spend a Lot of Time at Sea: On sea days, you are steps away from a bar 24/7. It is incredibly easy to hit your break-even point when you're lounging by the pool all day.

  • You're Visiting Private Islands: If your itinerary includes Perfect Day at CocoCay (Royal Caribbean) or Labadee, your drink package actually works on the island. This adds a massive amount of value to your purchase.

When the Drink Package is a WASTE of Money

  • Your Itinerary is Port-Intensive: If you are on a European or Alaskan cruise where you are off the ship from 8:00 AM to 5:00 PM almost every day, you won't have enough time on board to drink your money's worth.

  • One of You Doesn't Really Drink: Because of the "all adults in the cabin must buy it" rule, if you drink 8 cocktails a day but your spouse only drinks water, you are paying for two packages while only utilizing one. You will lose money overall.

  • You Only Drink Beer: Because beer is significantly cheaper than cocktails, you have to drink almost double the volume to break even. If you're a beer-only cruiser, paying a la carte is usually the smarter play.

The Verdict

Before hitting "purchase" in your cruise planner, look at your itinerary and your daily habits. If you honestly see yourself having a specialty coffee in the morning, a few beers by the pool, wine at dinner, and a cocktail during the evening theater show, the package will likely save you money.

If that sounds like exhausting work just to break even, save your cash, pay a la carte, and spend that money on a fantastic shore excursion instead.

The above is subject to change. Check back often to TRAVEL.COM for the latest travel information and deals.

Related Posts

Coming Soon: Clickable Maps